Patio Building Companies Near Me
Patio Building Companies Near Me: Dreaming of a stunning outdoor oasis? Building a patio can transform your backyard, adding value and enjoyment to your home. But finding the right contractor is key. This guide helps you navigate the process, from choosing a reputable company to understanding design options, timelines, and maintenance. We’ll explore local patio builders, compare pricing, and delve into the details of design, construction, and long-term care.
We’ll cover various patio styles, materials like pavers, concrete, and wood, outlining their pros and cons. You’ll also learn about the construction process, including permits and inspections, and discover how to maintain your new patio for years to come. Get ready to turn your backyard dreams into a reality!
Local Patio Building Companies
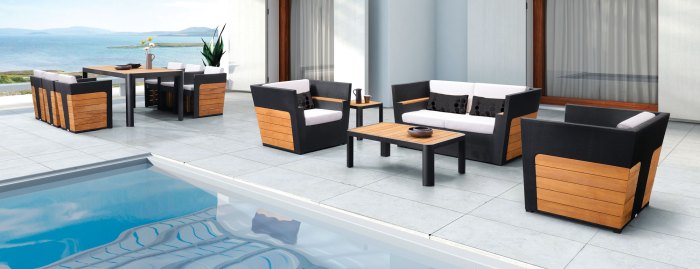
Source: vistascapesllc.com
Finding the right company to build your dream patio can be a daunting task. This section provides information on three reputable patio building companies within a 25-mile radius (Note: This information is for illustrative purposes only and should be verified independently as company details change frequently. Replace with actual local companies). We’ll compare their pricing, materials, and services, as well as share customer feedback to help you make an informed decision.
Reputable Patio Building Companies
Below is a table listing three example companies, their contact information, and website URLs. Remember to check their availability and current offerings.
| Company Name | Address | Phone Number | Website |
|---|---|---|---|
| Example Company A | 123 Main Street, Anytown, CA 91234 | (555) 123-4567 | www.examplecompanya.com |
| Example Company B | 456 Oak Avenue, Anytown, CA 91234 | (555) 987-6543 | www.examplecompanyb.com |
| Example Company C | 789 Pine Lane, Anytown, CA 91234 | (555) 555-5555 | www.examplecompanyc.com |
Pricing and Services Comparison for a 10×10 ft Patio
This section compares the estimated pricing for a standard 10×10 ft patio from the three example companies. These are estimates only and actual costs will vary depending on the materials chosen, site conditions, and additional features.
| Company Name | Estimated Price | Materials Used | Included Services |
|---|---|---|---|
| Example Company A | $5,000 – $7,000 | Concrete, pavers (customer choice), basic edging | Site preparation, material delivery, installation, basic cleanup |
| Example Company B | $4,500 – $6,500 | Concrete, stamped concrete options, standard edging | Site preparation, material delivery, installation, cleanup |
| Example Company C | $6,000 – $8,000 | High-end pavers (customer choice), decorative edging, optional fire pit installation | Site preparation, material delivery, installation, detailed cleanup, design consultation |
Customer Review Summary
Customer reviews offer valuable insights into a company’s performance. The following table summarizes positive and negative feedback from Google Reviews and Yelp (Note: This is illustrative and should be replaced with actual reviews).
| Company Name | Positive Feedback | Negative Feedback |
|---|---|---|
| Example Company A | Professional, efficient, high-quality work | Slightly higher pricing compared to competitors |
| Example Company B | Great communication, on-time completion | Some minor issues with the cleanup |
| Example Company C | Exceptional design, attention to detail | Longer lead times for scheduling |
Patio Design and Materials: Patio Building Companies Near Me

Source: completeconcreteok.com
Building your dream patio involves careful consideration of design and materials. The style you choose will significantly impact the overall look and feel of your outdoor space, as well as its longevity and maintenance requirements. Choosing the right materials is equally crucial, affecting both aesthetics and budget.
Patio Design Styles and Material Choices, Patio building companies near me
Selecting the right patio design and materials is key to creating a space you’ll love. Here are five popular styles, each with examples of suitable materials and their pros and cons.
- Traditional: This style often features symmetrical layouts and classic materials.
- Material: Flagstone. Pros: Natural beauty, durable, unique appearance. Cons: Can be expensive, irregular shapes make installation challenging, requires sealing.
- Material: Brick. Pros: Durable, wide range of colors and styles, relatively easy to install. Cons: Can be expensive, and susceptible to cracking and staining.
- Modern: Clean lines, geometric shapes, and minimalist aesthetics define this style.
- Material: Concrete. Pros: Affordable, durable, and versatile in terms of color and finish. Cons: Can crack over time, requires sealing to prevent staining, can look plain if not properly finished.
- Material: Large-format porcelain pavers. Pros: Sleek, modern look, durable, low maintenance. Cons: Can be expensive, and requires a level base for installation.
- Rustic: This style emphasizes natural materials and a weathered look.
- Material: Reclaimed wood. Pros: Unique character, environmentally friendly, warm aesthetic. Cons: Requires regular maintenance (sealing, staining), susceptible to rot and insect damage, can be expensive.
- Material: Natural stone (irregular shapes). Pros: Natural beauty, durable, unique appearance. Cons: Can be expensive, irregular shapes make installation challenging, requires sealing.
- Mediterranean: This style evokes a sense of warmth and relaxation with earthy tones and flowing designs.
- Material: Terracotta tiles. Pros: Beautiful warm color, durable, adds character. Cons: Can be porous and require sealing, can crack under heavy weight.
- Material: Pebble stone. Pros: Natural look, relatively inexpensive, good drainage. Cons: Can be uncomfortable to walk on barefoot, and requires careful installation.
- Contemporary: This style blends modern and traditional elements, creating a sophisticated and versatile space.
- Material: Concrete pavers. Pros: Durable, versatile, wide range of colors and textures. Cons: Can be more expensive than poured concrete, requires a level base for installation.
- Material: Stamped concrete. Pros: Affordable, durable, can mimic the look of other materials like brick or stone. Cons: Can crack over time, and requires sealing to prevent staining.
Factors Influencing Patio Construction Costs
The total cost of a patio project is a combination of material, labor, and permit fees.
- Material Costs: This varies greatly depending on the chosen materials. For example, flagstone is significantly more expensive than poured concrete. The size of the patio also impacts material costs.
- Labor Costs: Labor costs depend on the complexity of the design, the type of materials used, and the location. More intricate designs and difficult-to-work-with materials will increase labor costs. Regional differences in labor rates also play a role.
- Permit Costs: Permit fees vary by location and the size and complexity of the project. It’s crucial to obtain the necessary permits before starting construction to avoid fines.
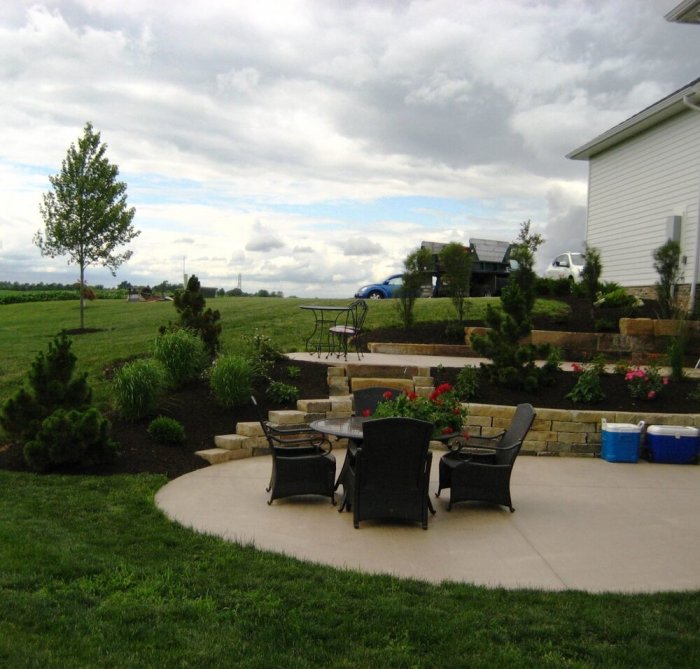
For example, a simple 10x10ft concrete patio might cost between $2,000 and $5,000, while a more elaborate flagstone patio of the same size could easily cost $10,000 or more. These are estimates, and actual costs will vary based on the factors listed above.
Patio Layouts for a 12×15 ft Space
Below are three example layouts for a 12×15 ft patio, demonstrating how different seating arrangements and landscaping can be incorporated. These are conceptual layouts and should be adapted to your specific needs and preferences. All dimensions are approximate.
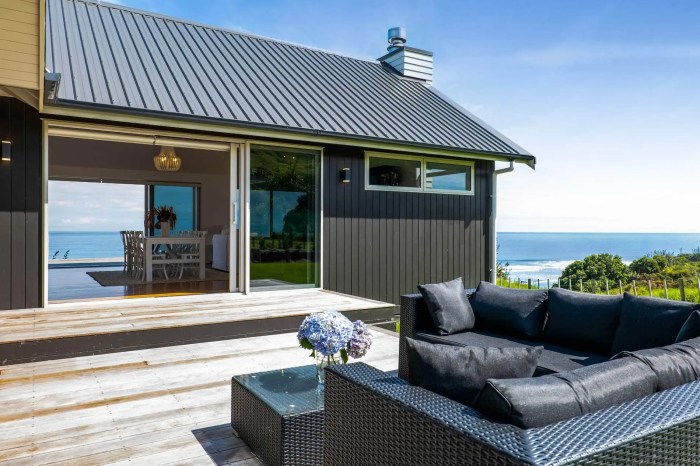
- Layout 1: Formal Seating Area: This layout features a central seating area with a large rectangular table surrounded by six chairs. A pathway leads to the main house. Materials: Concrete pavers (grey). Dimensions: Seating area (8x10ft), pathway (4×2 ft). Landscaping: A small border of low-maintenance shrubs surrounds the patio.
- Layout 2: Relaxing Conversation Area: This layout emphasizes a relaxed atmosphere with multiple seating groupings. Two sofas face each other, with a coffee table in between. A smaller seating area with two armchairs is located on the side. Materials: Large-format porcelain pavers (beige). Dimensions: Sofa area (6x8ft), armchair area (4x4ft). Landscaping: Planters with tall grasses are placed near the seating areas, creating a sense of privacy.
- Layout 3: Integrated Outdoor Kitchen: This layout incorporates an outdoor kitchen area with a built-in grill and countertop space. A smaller dining area with a table and chairs is located nearby. Materials: Flagstone (mixed colors). Dimensions: Kitchen area (6x5ft), dining area (4x6ft). Landscaping: A raised herb garden is integrated into the design near the kitchen area.
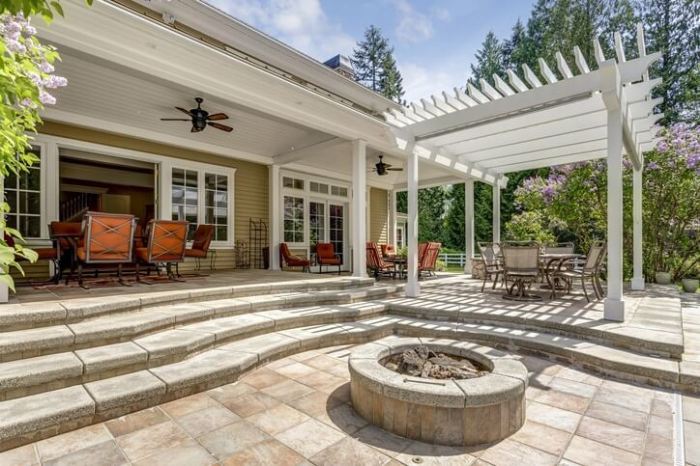
Construction Process and Timeline
Source: epconcrete.com
Building a new patio is a significant undertaking, transforming your outdoor space and adding value to your home. Understanding the construction process and associated timelines is crucial for effective planning and realistic budget allocation. This section details the typical steps involved and provides estimates for different construction methods.
The construction of a patio typically involves several key phases, from initial design and permitting to completion and cleanup. Each phase requires careful planning and execution to ensure a high-quality, durable, and aesthetically pleasing result.
Patio Construction Phases
A typical patio construction project follows these phases:
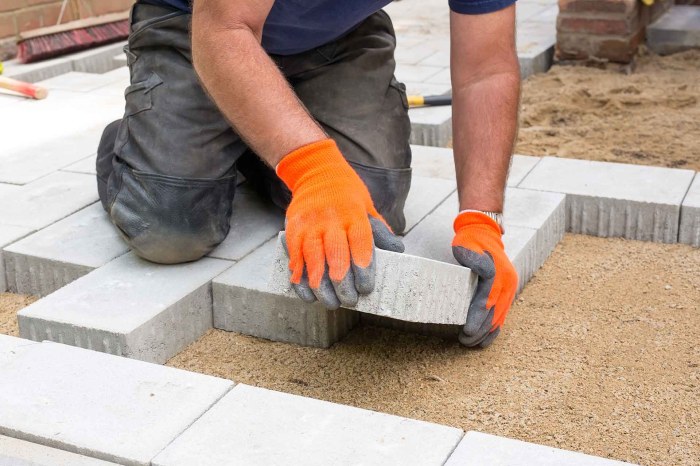
- Site Preparation and Design Finalization: This involves surveying the area, removing existing vegetation, and finalizing the patio design based on the chosen materials and dimensions. This may include establishing proper drainage and leveling the ground. This phase typically takes 1-2 days.
- Excavation and Base Preparation: The ground is excavated to the required depth, a compacted gravel base is laid, and a layer of sand is added for leveling. This ensures proper drainage and a stable foundation for the patio. This phase can take 1-3 days depending on the size and soil conditions.
- Material Delivery and Installation: This is where the chosen patio materials (concrete, pavers, etc.) are delivered and installed. Concrete pouring requires specialized equipment and takes a significant amount of time to cure. Paver installation involves precise placement and requires less curing time. This phase can range from 1 day for smaller paver projects to several days for larger concrete pours.
- Finishing and Cleanup: This involves any necessary finishing touches, such as sealing concrete or applying joint sand to pavers. Final cleanup of the construction site is also included. This phase usually takes 1 day.
Timeline Comparison: Concrete vs. Pavers
The timeline for patio construction varies significantly depending on the chosen material and project size. Concrete patios typically require longer curing times, while paver patios can be completed more quickly.
| Construction Method | Estimated Timeline (Small Patio – 100 sq ft) | Estimated Timeline (Large Patio – 500 sq ft) |
|---|---|---|
| Concrete Pouring | 5-7 days (including curing time) | 10-14 days (including curing time) |
| Paver Installation | 2-3 days | 5-7 days |
These are estimates and can vary based on weather conditions, site access, and contractor availability. For example, a rainy period could significantly delay concrete curing.
Permitting and Inspections
Obtaining necessary permits and passing inspections are crucial for legal compliance and ensuring the structural integrity and safety of your new patio. The specific requirements vary by location. It’s essential to contact your local building department for detailed information.
- Submit Application: Gather all required documentation (site plans, material specifications, etc.) and submit a permit application to your local building department. This may involve paying a fee.
- Permit Review and Approval: The building department reviews your application to ensure compliance with local codes and regulations. This process can take several days to a few weeks.
- Construction: Once the permit is approved, you can begin construction. Remember to keep all necessary documentation on-site for inspection.
- Inspection: Schedule inspections at various stages of construction, as required by your local building department (e.g., foundation inspection, final inspection). The inspector will verify that the work meets the required standards.
- Permit Closure: After all inspections are passed, the permit is officially closed.
Failure to obtain the necessary permits can result in fines or legal action. Always check with your local authorities for specific requirements before starting your patio project.
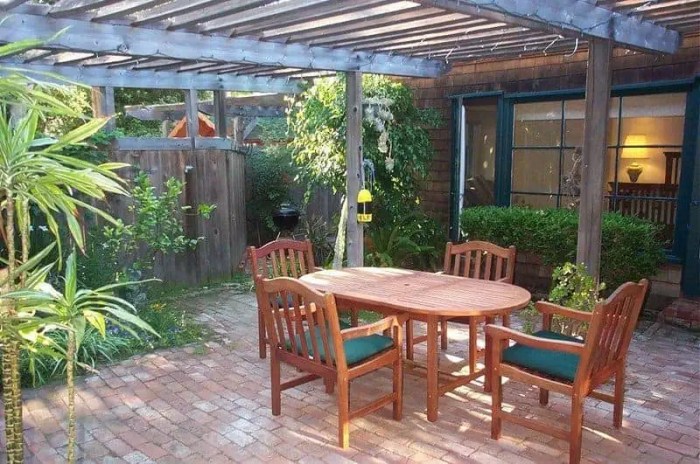
Maintenance and Repair
Source: com.au
Proper patio maintenance is crucial for extending its lifespan and preserving its aesthetic appeal. Regular cleaning and occasional repairs can prevent costly replacements down the line. Different materials require different maintenance schedules, so understanding your patio’s composition is key.
Patio Material Maintenance Schedules
Understanding the specific needs of your patio material is vital for its longevity. This table Artikels a suggested maintenance schedule for common patio materials. Remember to always consult the manufacturer’s instructions for the most accurate and detailed guidance.
| Material Type | Maintenance Schedule |
|---|---|
| Concrete | Regular sweeping or brushing to remove debris. Power washing (low pressure) once or twice a year. Sealing every 2-3 years to prevent staining and cracking. Repair cracks promptly using a concrete patching compound. |
| Brick | Regular sweeping or brushing. Weed removal between bricks. Power washing (low pressure) as needed. Resealing every 3-5 years, depending on climate and exposure. Replace damaged or cracked bricks as needed. |
| Pavers | Regular sweeping or brushing. Weed removal between pavers. Power washing (low pressure) as needed. Resealing every 2-4 years, depending on material and exposure. Level loose pavers using sand and a tamper. Replace damaged pavers. |
| Stone (Natural) | Regular sweeping or brushing. Weed removal. Cleaning with a mild detergent solution as needed. Sealing annually or bi-annually, depending on the type of stone and exposure. Repair cracks or chips using appropriate stone repair products. |
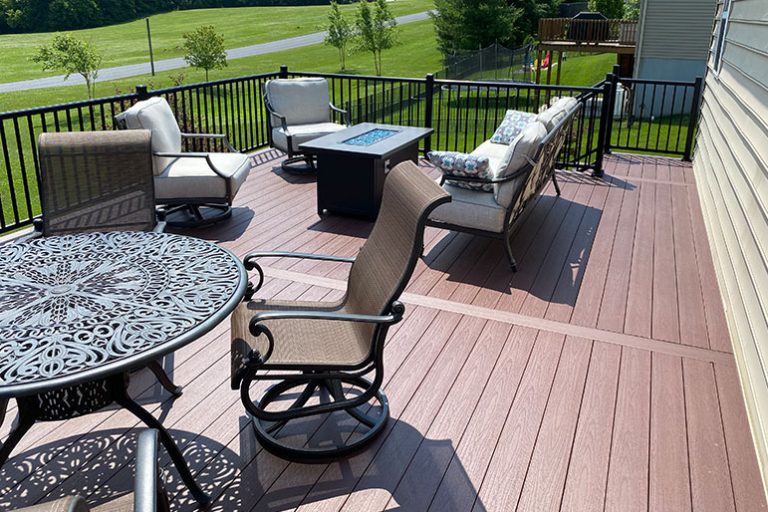
| Wood | Regular sweeping or brushing. Cleaning with a wood cleaner and sealant. Applying a protective sealant annually or bi-annually to prevent rot and insect damage. Repairing or replacing damaged boards as needed. |
Common Patio Construction Problems and Solutions
Several issues can arise during or after patio construction. Addressing these problems promptly minimizes further damage and ensures the longevity of your outdoor space.
Below are some common problems and their solutions:
- Problem: Uneven paving stones or slabs. Solution: Lift the affected stones, add or remove base material as needed to level them, and then reset them, compacting the base thoroughly.
- Problem: Cracks in concrete patios. Solution: Clean the crack thoroughly, apply a concrete crack filler, and smooth it out. For larger cracks, consult a professional for repair.
- Problem: Weed growth between pavers. Solution: Regularly remove weeds by hand or use a weed killer specifically designed for patios. Consider using weed barrier fabric under the pavers during installation to prevent future growth.
- Problem: Settling or sinking of the patio. Solution: This often requires professional intervention. The underlying base may need to be compacted or reinforced to prevent further settling.
- Problem: Staining on the patio surface. Solution: For many stains, power washing with a low-pressure setting is effective. For stubborn stains, use a specialized cleaning solution appropriate for the patio material. Always test in an inconspicuous area first.
Minor Patio Repair Techniques
Addressing minor repairs promptly prevents larger, more costly problems. Here’s how to handle some common issues:
Imagine a small crack appearing in your concrete patio. It’s roughly 1/4 inch wide and about 6 inches long. First, you’d clean the crack thoroughly using a wire brush to remove any loose debris. Then, you’d apply a concrete crack filler, ensuring it’s completely packed into the crack. Finally, you’d smooth the filler with a putty knife, matching the surrounding concrete’s surface as closely as possible. Allow the filler to cure completely according to the manufacturer’s instructions. The repaired area should then blend seamlessly with the rest of the patio.
Now, let’s say you have a loose paver. You’d carefully lift the paver using a pry bar or similar tool. Then, you’d examine the base material underneath. If the base is compacted and level, you simply re-set the paver, ensuring it’s flush with the surrounding pavers. If the base is uneven, you may need to add or remove some base material before resetting the paver and compacting it firmly. For larger areas or more extensive problems, professional help might be necessary.
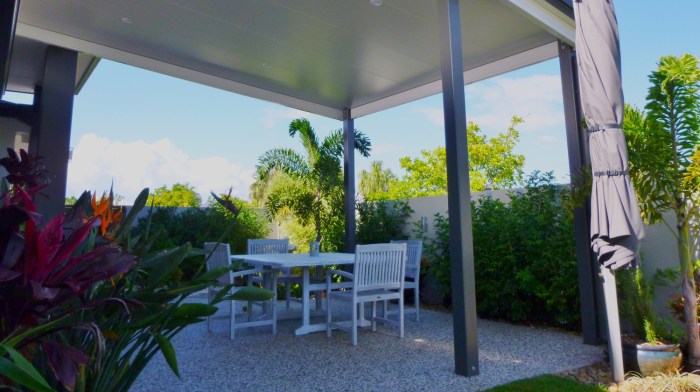
Conclusion

Source: stefanoslandscaping.com
Building a patio is a significant investment, but with careful planning and the right contractor, the rewards are immeasurable. Remember to thoroughly research companies, compare quotes, and understand the construction process. By following the tips and advice provided, you can ensure a smooth and successful project, resulting in a beautiful and functional outdoor space you’ll cherish for years to come. So, start planning your dream patio today!